Preserved Lemons

We treated ourselves to another trip to Morocco this month. I went with the expectation of doing not much but having my taste buds stimulated. Moroccan food can be fabulous but when I’ve tried to make it myself the results haven’t been terribly impressive.
I am particularly keen on tagines, and one of the best I’ve ever had was Chicken with Olives and Preserved Lemons.
I’ve bought commercially preserved lemons before and always found them decidedly unattractive in appearance and in flavour – being nothing more than small lemons dropped into brine. Yuch! They are quite expensive too!
Once my mind was in ‘North African mode’ I got myself organised and made these preserved lemons a month before we travelled. It’s about ten minutes of work and then leave them alone for a month.

preserved lemons

I recommend organic lemons but I get mine from Aldi as they are only £0.17 each. I’m not sure whether they are organic or even unwaxed: so I give them a brisk wash in hand hot water with a spritz of white vinegar then rinse.

You don’t even need a preserving jar – a cleaned and sterilised jam jar works just as well.

Ingredients

  • 4 lemons (unwaxed and preferably organic) per 400ml preserving jar
  • 4 teaspoons salt
  • An extra lemon for juicing
  • Water that has been boiled and cooled


Instructions

  1. You can make however many preserved lemons you like, but roughly 3 or 4 will fit per pint-sized jar.
  2. Thoroughly clean the lemons and trim the nubs off both ends.
  3. Stand the lemon on its end.
  4. Quarter each lemon, slicing a cross into one end of each lemon, going about two-thirds of the way he way to leave the slices attached at the end and fan out the four segments.
  5. Put one teaspoon of salt into the cavity of each lemon.
  6. Add a teaspoon salt into the bottom of the jar.
  7. Put the first lemon in the jar, open side down,
  8. Press firmly so that the lemon juice leaks out.
  9. Press the second and third lemons on top of the first giving each a firm press.
  10. The jar should be about half full of lemon juice.
  11. If not half full of juice repeat with the fourth lemon.
  12. Put a teaspoon of salt on top of the last lemon.
  13. Pour the boiled & cooled water into the jar to fill it to the top.
  14. Screw the lid on and add a label with todays date and give it a shake.
  15. Leave the jar to sit at room temperature for a week, turning the jar over and giving it a shake a couple of times per day. (I leave mine by the side of the hob so I remember to do this)
  16. After a week transfer the jar to the refrigerator and leave for three more weeks before using.
  17. Store in the fridge, will keep for at least 6 months.

To use the lemons it is the rind you want so remove from the jar, place on a chopping board and scrape away the lemon flesh and pips with the back of a knife and optionally rinse the rind under a cold tap to remove excess salt. Slice the rind into strips – thin or thick to suit the recipe. In the Chicken and Olive tagine I slice the rind segments in quarters again ….

The shredded rind makes a great addition to a boring old salad


Posted in Prepare ahead, Preserves, Salad, Slow, Vegetarian

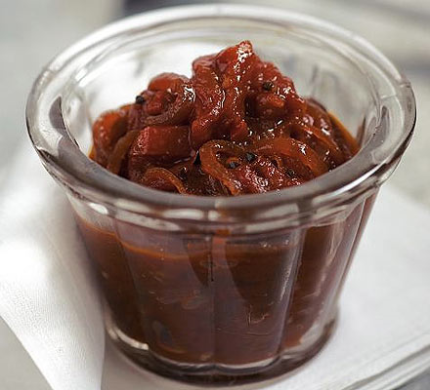
Spicy Tomato Jam

Couldn’t be simpler really: eats well with cheese or on a bacon sandwich – less sweet than ketchup and you know what’s gone into it

 Image

  • 500g red onions, finely sliced
  • 1kg tomato, chopped
  • 4 garlic cloves, crushed
  • 1 red chilli, chopped (or more if you like a bit of bite)
  • 4 cm piece ginger, peeled and grated
  • 200g brown sugar
  • 150ml wine vinegar
  • 5 cardamom seeds
  • ½ tsp paprika

Tip all the ingredients into a large heavy-based pan

Bring to a gentle simmer, stirring frequently.

Simmer for 1 hour.

Bring to a gentle boil so that the mixture turns dark and shiny.

Place into sterilised jars and allow to cool before covering.

Will keep for about 2 months in the fridge: .

Posted in Preserves, Spicy, Vegetarian

Smoky pulled pork and barbeque sauce

Spice Trip recipe pulled pork

I have several slow pork recipes but this one is becoming the favourite. You might need to tone down the chilli in this one – we like it quite lively. I usually increase the barbeque sauce quantities (except the sugar) by half again and bottle the left over sauce – it is great on burgers and a lot less sweetened than the commercial products. I like it quite runny but a longer boil makes it thicker. Keeps in the fridge for a month or six weeks.

Serve the pulled pork in pitta bread, or tortilla rolls with salad or just flung on top of a bowl of crunchy salad.

Ingredients

  • ½ shoulder of pork, (about 2kg) on or off the bone
  • 350ml dry cider/apple juice

For the dry rub

  • 2 tbsp fennel seeds
  • 1 tbsp black peppercorns
  • 3 tsp dried chilli flakes
  • 2 tbsp. chipotle paste (or
  • 2 garlic cloves
  • ½ tbsp coriander seeds
  • ½ tbsp cumin seeds
  • 1 tbsp smoked paprika
  • 2 tbsp brown sugar

For the barbecue sauce

  • 400ml passata
  • 1 tbsp Dijon mustard
  • 2 tbsp sugar
  • 60ml cider vinegar

Method

  1. Preheat the oven to 200°C/gas mark 7.
  2. Grind the rub ingredients in a pestle and mortar until coarse.
  3. Remove the skin from the pork (keep to make crackling).
  4. Sprinkle the pork generously with salt. Heat a good glug of oil in a deep, flameproof casserole with lid until hot,
  5. Brown the pork all over
  6. Remove from the casserole and smear with cover with the dry rub. [If you use bare hands be sure to wash them thoroughly afterwards – honest!
  7. Drain the excess fat from the casserole and return the pork to it.
  8. Tip the cider/apple juice over the pork.
  9. Cook in the oven, uncovered, for 20 minutes
  10. Reduce the oven to 140°C/gas mark 1, cover and cook for a further 3½-5 hours, by which time the meat will be soft and pull apart easily.
  11. Remove from the oven and remove the pork to  plate.
  12. Tip the liquid into a large pan and return the pork to the original pan and replace the lid
  13. Bring the cooking liquid to the boil, add the barbecue sauce ingredients and season.
  14. Turn the heat down and leave to bubble for 10–15 minutes, until it has thickened and reduced a little.
  15. Meanwhile pull the pork apart with a fork so it’s nicely shredded.
  16. Serve however you like – with the barbeque sauce on the side


Posted in Leftovers, Meat, Pork, Slow, Spicy, Uncategorized

Rabo de Toro: Oxtail Casserole

I’ve loved Oxtail (Bull’s Tail) since I was a child: I liked the warm heartiness and decidedly meaty flavour of canned Oxtail Soup, one of the famous 57 varieties! As I grew older I got to experience the delights of Mulligatawny and then the joy of real oxtails.

Anyway, we’ve just returned from a trip to various Spanish cities so I thought I’d put up a version of a common Andalucian dish, seemingly more common further north. This can be cooked on the hob but to my mind that means I’ve got to go and have a stir every now and again and I can’t help but dip a wodge of crusty bread in if I’m stirring it.

oxtail

Ingredients

MARINADE:

  • 3 1/2 lbs oxtails, cut into rounds (my butcher calls them rings)
  • Saffron threads, if you like, or have them
  • 3 carrots, finely diced
  • 2 onions, diced or 4 small leeks, chopped
  • 1 red bell pepper, diced
  • 4 cloves garlic, minced
  • 1 bottle Spanish red wine

STEW:

  • 4 good glugs of olive oil (you might need another glug or two)
  • 25 beef suet optional
  • 1 red sweet pepper, sliced
  • 2 tablespoons tomato concentrate/paste or passata
  • Salt and freshly ground black pepper
  • Finely chopped parsley, for garnish

DIRECTIONS

The day before you want to eat marinate the beef: 12 hours minimum (but I’ve done this several times now and 2 days is also okay – it’s that kind of recipe)

MARINADING: Trim the obvious fat from the oxtail pieces. If you have them press a couple of saffron threads into the top of each oxtail round. Add the chopped vegetables (including the garlic) to the pan and pour in 1 bottle of Spanish red wine, or more if needed; the liquid should just cover all the ingredients – if you are a little short top up with water, vegetable stock, beef stock or another bottle of red wine. Cover and marinate in the refrigerator for 24 hours.

MAKING THE STEW: Remove the oxtails pieces from the marinade and set aside. Drain the marinade from the vegetables and reserve both the liquid and the strained vegetables.

  1. In a deep heavy pan with a lid (I use the Le Creuset casserole pan), heat the olive oil over medium-high heat. Add the suet, if using, and cook down for a couple of minutes.
  2. Add the reserved strained vegetables and sauté until lightly caramelised, roughly 10 minutes.
  3. Add the peppers and continue to slowly caramelise all the ingredients together for 15 minutes longer.
  4. Scoop the vegetables out and put to one side leaving the oily juices in the pan.
  5. Add the oxtail ‘rings’ to the hot fat and seal the meat all over once and put to one side – they are not going to be ‘browned’ much but merely sealed a little. Don’t stress just colour them up a little. You may need to do this in two or more batches and add a litlte extra oil
  6. Add the vegetables back to the pan.
  7. Add the reserved marinade. The liquid should just barely cover the oxtails. If needed, top up the liquid with water or beef stock. (Don’t use more wine).
  8. Add the tomato paste.
  9. Cook in the over on a slow, low heat (120C) until the meat from the tails is falling off the bone but still succulent and moist, about 4 hours.
  10. Check the seasoning of the stew with salt and pepper.
  11. Garnish with finely chopped parsley and/or chives,

If you are serving as a main meal serve with roasted potatoes, vegetables of your choosing and crusty bread as you will need something to mop up the beefy juices and licking the plate is considered rude at most dinner parties.

If you are serving as tapas you are good to go!

Variants:

We like to add a chilli to the stew for a bit of background warmth.

Mexicanish: Double up the onions and add two (or more) sliced red chillies to the vegetables list, an hour before cooking finishes add 2 tins of (cooked) kidney beans and a tablespoon of cumin and if you want 1oz (25g) of dark chocolate  (I also add sweet corn too but that’s a smugglers trick). Great in a burrito.

For a more English version add celery to the vegetables list and throw in a couple of snapped bay leaves

For an Asian version add a stick of cinnamon and 2 star anise to the marinade (pull them out before you serve)

Make a soup from the left overs: retain the meaty portions: blitz the liquid part and rub the meat off the bones into the liquidised juices. One of the best oxtail soups I’ve had.

Soup 2: Stir in a big dollop of your favourite (or left over) curry paste to the liquid and flake the meat in now for a half decent Mulligatawny. For some reason I thought of Spike Milligan while I was writing that.

Apparently lots of folk serve oxtail with mashed potatoes. Eek! I have my own teeth I don’t want meat and veg that I can eat with a spoon! I suppose it’s up to you. Or if you know someone in a sick bed …. …. Yes I know I used to liquidise something very similar when my daughter was weaning but that is ages ago now.

Posted in Beef, Cook-ahead, One pot, Prepare ahead, Slow, Soup, Uncategorized

Chocolate (no bake) traybake

The younger of the two teens is off on a “Team and Leadership Development” Course this week so we have spent much of the weekend working out how many layers of clothes may be neccessary and what emergency food she might want to take with her. I thought I’d make these to feed her and her friends on the journey into the nether regions of the Lake District. All of 90 minutes! I used one of the disposable foil trays so there was no hassle bringing anything back.

  • 60g plain chocolate, chopped
  • 60g milk chocolate, chopped
  • 100g unsalted butter
  • 2tbsp. golden syrup
  • 200g oat biscuits (Hobnobs are great) – but I used the fragments of flapjack from last weekend
  • 50g sultanas
  • 50g mixed nuts chopped
  • 100g popped rice

Topping

  • 150g milk chocolate
  • 50g white chocolate

Method

  1. Lightly butter a 20cm x 20cm baking tray and line with baking paper
  2. Mix the butter and syrup in a pan and melt together over a moderate heat.
  3. Take the pan off the heat and add the plain and dark chocolate. There should be enough residual heat to melt the chocolate.
  4. Add the crushed biscuits, sultanas and puffed rice and mix all thoroughly together to coat everything with the chocolatey goo.
  5. Tip the mixture into the tray and put into fridge until set
  6. Make the topping by melting the dark chocolate and then pouring a thin layer over the base
  7. Leave in the fridge to set
  8. Melt the white chocolate and make your best artistic impressions on the top of the dark chocolate. Swirls will do unless you feel more adventurous. Move over Picasso.
  9. Once that has set cut into small rectangles of about  2cm x 2cm – it’s very rich.

Variants

Instead of popped rice use Maltesers (can you get them in the US?) or honeycomb

Posted in Chocolate, Snack

Bread and butter pudding

I was caught a little bit on the back foot to find we had guests for supper tonight and one of them has requested B&B pud ‘like last time’. Normally I would use my own fruit loaf (or as the kids call it – tutti-frutti loaf) but I don’t have one in so I relented and bought a supermarket specimen which is not bad… it just lacks the cherries and preserved ginger and some spices. Tsk.

Ingredients

  • 25g soft butter, plus extra for greasing
  • 1 tsp. allspice powder
  • 8 slices fruit bread
  • 400ml milk (full fat is best but 2% or 1% work – fat free – nah!)
  • 2 eggs
  • 1 egg yolk
  • 1 tbsp. caster sugar
  • grated nutmeg, to taste

Method

  1. Grease a 1 litre dish lightly with butter. (Mine is 20cm x 20cm and about 2.5 cm deep)
  2. Mix the allspice with the 25g of softened butter
  3. Spread each slice of bread with the spiced butter
  4. If you wish to: cut the crusts off the bread then cut into triangles. I don’t.
  5. Arrange the bread in layers along the dish – you need some corners sticking up to go crispy
  6. Warm the milk in a pan over a low heat. If it’s too hot to hold your finger in, its’ ready
  7. Break the eggs into a bowl with the yolk, add the sugar and whisk until pale.
  8. Pour the milk into the eggs in the bowl while stirring. Then tip everything back into the pan
  9. Turn the heat off and stir the custard on the hob for one more minute
  10. Pour the custard over the bread layers.
  11. Leave to stand. 10 minutes is okay, 30 minutes is better
  12. Preheat the oven to 180C.
  13. Bake the pudding for 30-40 minutes: the custard will set and the top becomes golden-brown.
  14. Serve with a dollop of thick cream, ice cream or, if you have to, custard. I like vanilla yogurt here.

Variants

  • Use plain bread and add seasonal fruit to your taste. Rum soaked raisins work well.
  • Press three triangles of bread into a ramekin and fill with the custard mix – bake for 15 – 20 mins
Posted in Baking, Dessert

Goulash

Today is a miserable Friday – windy, grey and overcast so I thought we’d have something nice and warming for supper. Beef (and mushroom) goulash, I know it’s not authentic but I like smoked paprika. As we are having friends tonight I splashed out and bought slightly more expensive steak than I normally would,  plus – the kitchen smells great. I just need to stop dipping crusty bread in the juices.

Preparation time: 20 minutes. Cooking time 1.5 hours.

Ingredients

  •  2  tbsp oil
  • 600g  steak,  cut  into  bite size chunks
  • 2 tbsp. plain flour
  • 400g onions,  thinly  sliced
  • 4 fat cloves of garlic,  finely  chopped
  •  400g field mushrooms cut into bite size pieces
  • 2  tbsp tomato puree
  • 1  heaped tbsp. paprika
  • 1 chili finely chopped (optional)
  • 4 tomatoes chopped (tinned ones are fine but drain them first)
  • 1/2 glass of white  wine (or water)
  •  300ml stock  (beef, chicken or vegetable)
  •  4 tbsp.  soured  cream
  • 2 tbsp. chopped chives

Method

  1. Heat the oven to 140C
  2. Heat 1 tbsp. oil in heatproof casserole on a moderate heat on the hob
  3. Sprinkle the flour in a shallow bowl and season with salt and pepper
  4. Toss the cubes of beef in the flour to lightly coat
  5. Fry the floured beef in batches until lightly golden all over
  6. Put the fried beef to one side
  7. Add another tbsp. oil to the casserole
  8. Gently fry the mushroom, garlic and onions until the onions have softened
  9. Add the tomato puree, paprika, chili if you are using it
  10. Add the white wine or water and let it bubble for a minute
  11. Add the beef, chopped tomatoes and stir on the heat for two minutes
  12. Cover with a lid and bake in the oven for 1.5 hours. (or simmer on the hob for same)
  13. Serve over buttered noodles or rice with a tbsp of soured cream on top sprinkled with chives

Variants

  • I often use shin beef in this recipe and cook for 3 hours
  • Use sliced peppers instead of the mushrooms
  • Use pork instead of the beef – pork and peppers is much nicer than pork and mushrooms IMHO
  • If you want a really low fat version use diced turkey (I buy turkey legs as they are very cheap!) and halve the quantity of oil
  • Use coarsely ground beef instead of chunks – and it cooks a lot quicker
  • For a vegetarian option use various mushrooms to replace the beef, and optionally add sweetcorn kernels (I use the frozen ones) about fifteen minutes before serving.
  • As a second vegetarian option omit the mushrooms and add diced tofu part way through the cooking
  • To feed a lot of people add chunks of potato – I do this for a family barbeque
Posted in Beef, Slow, Spicy

‘Breakfast’ flapjacks

We often end up with a lot of breakfast cereals left over: at the moment we have muesli, chocolate popped rice, corn flakes and something akin to cornflakes with dried berries. So I’m making flapjacks but feel free to use just oatmeal. I find it works better with a combination of large and small oats to give a crumbly texture – with just fine oats they are too firm and with just large oats they are too crumbly.

Preparation time: 15 minutes. Cooking time 20 minutes.

Ingredients (makes about 12)

  • 200g unsalted butter
  • 100g sugar (golden caster, demerera or a mixture)
  • 200g golden syrup
  • 200g fine porridge oats
  • 200g mixed breakfast cereal
  • 200g chocolate (optional)

Method

  1. Heat the oven to 180C
  2. Grease and line a 20cm x 20cm cake tin.
  3. Add the butter, sugar and syrup to a saucepan on a moderate heat
  4. Warm until the butter has melted and the sugar has dissolved
  5. Tip in all the breakfast cereals and oats stirring to mix thoroughly
  6. Transfer the mix to the cake tin and spread evenly
  7. Bake in the oven for 15 – 20 minutes. It will be crisp on the edges but still fairly soft in the middle
  8. Allow to cool for five minutes in the cake tin
  9. If you are using the chocolate, melt the chocolate in a bowl over hot water
  10. Pour the melted chocolate over the biscuits and allow to cool until the chocolate is almost set
  11. Divide into suitably sized biscuits – I usually get 12.
  12. Store in an airtight box – they will get chewier over the next couple of days if there are any left

Variants

  • Use 400g of mixed oats
  • Add chocolate chips to the mix instead of coating with chocolate
  • Use any combination of golden syrup and honey
  • Add chopped fruit, nuts or coconut to replace part of the cereal mix
  • Cover with fondant icing instead of chocolate
  • It is possible to reduce the amount of sugar
Posted in Baking, Biscuits, Chocolate, Snack

Pork pho (noodle soup)

I was in Vietnam (Ho Chi Minh City) earlier this year for business and was introduced to Pho – (pronounced Fuh) for breakfast,usually beef. I like it so much we now grow Vietnamese basil. If you don’t have all the spices you could substitute a tsp. of powdered allspice – it’s not quite the same but it’s close. The Vietnamese usually use rice noodles but I have often replaced them with egg noodles which take just a little longer to cook.

Preparation time: 10 minutes. Cooking time: 10 minutes + resting. Serves 2 large appetites.

Ingredients

  • 1 pork tenderloin (this one is 462g – and about two inches across)
  • 1 tbsp. oil
  • 2 tbsp. lime juice
  • 2 tbsp. soy sauce
  • 2 tbsp. fish sauce
  • 250g fine rice noodles
  • 1 clove garlic grated
  • 3 fat spring onions finely sliced
  • 2cm fresh ginger, grated (or a tbsp. of ginger paste)
  • 1 litre chicken stock
  • 300g beansprouts
  • 175g baby pak choi, torn into pieces
  • 2 chilis chopped finely (more if you like it)
  • 2 vietnamese basil leaves
  • Square of muslin containing:
  • 2 cloves, 1 tsp. coriander seeds, 1 star anise, 2.5 cm. cinammon stick, 2 cardamom pods

Method

  1. Mix the lime juice, soy, minced garlic and fish sauce and coat the pork
  2. Leave to marinade for 15 minutes
  3. While it’s marinading – Bring the stock to the boil and reduce to a simmer.
  4. Add the spice bag to the stock and leave to infuse
  5. Add a tbsp. of oil to a frying pan and heat until smoking.
  6. Sear the tenderloin all over and leave on one side to rest.
  7. Bring the stock back to the boil then reduce to a simmer
  8. Add the noodles to the stock.
  9. Slice the pork as thin as you can (it will finish cooking in the stock)
  10. Add the spring onions, sliced chili and basil leaves
  11. Add the pork
  12. Add the beansprouts and then the pak choi
  13. Allow the pak choi to wilt in the hot stock
  14. Serve in deep bowls with extra sliced chilli and soy sauce on the side

Variants

Replace the pork with thin sliced beef, chicken, prawns, fish, vegetables or even tofu. Though tofu and fish will need to be cut thicker.

Posted in Soup, Spicy

Sausage and potato casserole

Another one pot meal. My butcher produces a wonderful meaty sausage which already contains fennel seeds so I like to use these when they are available but today I had some pork apple and leek in the freezer so I used them.

Preparation time: 15 minutes to cook the sausage. Cooking time: 40 minutes to bake.

Ingredients

  • 450g sausages
  • 1 tsp. fennel seeds
  • 4 tbsp olive oil
  • 1 onion halved and thinly sliced
  • 2 cloves garlic grated
  • 750g salad potatoes, chopped into bite sized pieces
  • ½ lemon
  • 4 fresh bay leaves
  • 2 tbsp. parsley

Method

  1. Preheat the oven to 180C
  2. Seperate the sausages
  3. Heat one tablespoon of the oil in a flameproof casserole dish.
  4. Add the onion, garlic to the casserole and fry until soft.
  5. Add the sausages and fry until nicely browned all over.
  6. Stir in the potatoes, browned sausages, bay leaves and a glass of water (150ml)
  7. Zest the lemon into the pan and then wring out the juice over the pan
  8. Season with salt and pepper
  9. Cover with the lid and bake for 30-40 minutes until the potatoes are tender.
  10. Remove the zest and bay leaves before serving

Variants

  • Add a sliced pepper or two to the casserole
Posted in Meat, One pot

Gnocchi di patate

Or, in English, potato dumplings; I first had these when one of my Italian friends at University said she’d cook for us but as we didn’t have a real hob we ‘made do’ with two one-ring electric hobs which we could hide easily. It was her mum who taught me the ragu recipe I posted earlier. These are an easy replacement for pasta, making them is a bit of a faff but it’s not difficult and quite fun – so if you have small children to entertain in the afternoon they might like to help if you prepare the mash for them. Some cooks use just the egg yolk but I don’t often have need of  a loose egg white so I use a full egg. I served these with a grilled pork chop and a green salad but they eat well on their own.

Preparation time: 25 minutes to make mash. Then 5 minutes. Cooking time: 10 minutes.

Ingredients

  • 400g dry mashed potatoes
  • 1 egg
  • 140g plain flour (plus extra for dusting)
  •  1 tsp. salt
  • 3 tbsp. creme fraiche (or cream)
  • 100g goats cheese

Method

  1. Peel potatoes cover with water in a pan and add pinch of salt.
  2. Bring to a boil, simmer very gently until soft, then drain thoroughly.
  3. Mash thoroughly without adding any liquid
  4. Add the egg, flour and 1salt, and mix until it comes together as a dough
  5. Dust a work surface and your hands with flour.
  6. Divide the dough into 2 portions
  7. Flatten the dough into a 1.5cm-wide strips.
  8. Roll each strip into a cylinder about as thick as your thumb
  9. Cut into 1.5cm pieces. Repeat with the other portion of the dough
  10. Using the back of a fork press lightly onto each dumpling (traditional but not absolutely neccessary)
  11. If not cooking immediately dust lightly with flour, cover with a tea towel and leave in the fridge.
  12. Boil a large pan of water – add extra salt
  13. Drop the gnocci into the boiling water
  14. When they are done when they float to the surface.
  15. While gnocchi are simmering break the goats cheese up with a fork and stir into the creme fraiche
  16. Place the gnocchi into an oven proof dish in a thin layer
  17. Coat with the cheesey creme fraiche
  18. Grill until golden

Variants

  • Use sweet potatoes instead of bog-standard white ones for a nuttier flavour
  • Mix a tablespoon of very finely chopped herbs into the dough (basil or sage work great)
  • Instead of gratinee cover the gnocchi with a pasta sauce of your choice (all’ arrabiata is my favourite) but puttanesca is excellent too.
  • Once the gnocci are boiled fry them in a little olive oil with butter and a couple of sage leaves
  • Use left over roast potatoes (just squeeze the potato from the crispy shell) or baked potatoes
Posted in Leftovers, Pasta, Quick, Supper, Vegetarian

Slow cooked sticky ‘Barbeque’ ribs

Tonight I need another slow meal as I don’t really know what time everyone will be back from the bonfire party; traditionally I finish these off on the barbeque but tonight they will be finished in the oven. If you prefer you could use ready made ketchup though the grown-ups here find most of those too sweet. If I am making the ketchup to keep I often spray the tomatoes, onion, celery,  garlic with the spices and chili and roast in the oven for an hour while there is a joint in there. Poaching the ribs first guarantees that the meat will be meltingly tender.

Ingredients

For the ketchup

  • 2  onions,  roughly chopped
  • 1 stick celery, roughly chopped
  • splash vegetable oil
  • 2 cloves of garlic
  • 1/2 tsp. cumin
  • 1/2 tsp. ground coriander
  • ½ tsp ground black pepper
  • 1 tsp salt
  • 1kg tomatoes roughly chopped
  • pinch dried chilis (or more to taste)
  • 100ml white wine vinegar
  • 80g caster sugar

For the barbeque sauce

  • 55g dark brown sugar
  • 50 ml dark soy sauce

2 sheets of pork ribs – ask the butche to separate them for you

Method

  1. Put the onions and celery into a food processor and whizz until finely chopped.
  2. Heat the oil in a very large saucepan add the onions and celery and soften over a low heat for 5 mins.
  3. Add the garlic and spices and cook for 5 mins more
  4. Stir in all remaining ingredients and bring to the boil.
  5. Simmer for 1 hr until the tomatoes are softy and the liquid has reduced by several inches.
  6. Blend the ketchup to your preferred consistency (I like it quite chunky)
  7. If it is very runny cook a little longer, stirring often, until reduced. At this stage it keeps for 3 months in an airtight container in the fridge. Keeps in sterilised bottles or jars for up to 6 months.
  8. To continue to a barbeque sauce
  9. Stir in the brown sugar and soy sauce
  10. Allow to cool

To cook the ribs

  1. Place the ribs in a large pan
  2. Cover with cold water
  3. Add a clove of garlic flattened with the blade of a knife
  4. Add four or five peppercorns
  5. Bring to the boil, cover with a lid, lower the heat to a simmer and cook for 1 hour.
  6. Preheat the oven to 180C
  7. Lift the ribs from the pan and lay flat in a roasting tray
  8. Smear the barbeque sauce over both sides of the ribs
  9. Roast until the glaze thickens and darkens (about 20 minutes).

Serve with jacket potatoes and salad.

Posted in Pork

Custard, creme pat. and others

Custard. Smooth unctuous creamy sauce to use almost anywhere. Except the shower of course! Though thinking of it ….. Once you have the basic custard method right the world is your lobster and leads into a world of ‘developments’. I poured this one over a sponge pudding yesterday.

Preparation: 10 minutes: Cooking time: 6 minutes. Makes 6 servings

Ingredients

  • 500 ml milk (full fat is best but the recipe works with 2% or 1% milk too – its just not as creamy – obviously. If you are being totally decadent you  could use cream)
  • 125 caster sugar
  • 1 vanilla pod/ 1 tsp. vanilla paste/6 drops of vanilla extract
  • 6 egg yolks

Method

  1. Split the vanilla pod lengthways, scrape out the seeds.
  2. Put the vanilla seeds, the milk and half the sugar in a pan over a moderate heat
  3. In a bowl whisk the yolks and the remaining sugar to a pale colour
  4. When the milk is boiling pour it into the bowl while whisking
  5. Pour the whole lot back into the pan
  6. Cook over a low heat stirring often with a wooden spoon until the custard has thickened slightly
  7. Do not boil it.
  8. When the custard is cooked it will coat the back of the spoon
  9. Take the pan off the heat and retrieve the vanilla pod from the custard
  10. If not using immediately pour into a warmed thermos  flask

Variants

  • Almost any flavouring can be added instead of the vanilla – try star anise or cardamom
  • To fill eclairs or sponge cake fold the cool custard into whipped cream (crème légère)
  • For a thicker custard eg for a trifle whisk 1 tbsp. cornflour into the eggs and carry on (crème patissière)
  • For the filling for a fraisier use 2 tbsp. cornflour and optionally 1 tbsp of suitable booze. The fraisier is intended to be sliced so the crème pat needs to be able to stand up.

Developments

  • use 4 whole eggs and at step 6 pour the custard in a blind baked pastry case, grate nutmeg over the top of the custard.Bake in the oven at 200C for 1 hour for a custard tart.
  • Line the 12 cells of a muffin tin with puff pastry and bake for 15 – 20 minutes at 200C for a Portuguese tart.
  • Fill individual ramekins with custard (flavoured or not) sprinkle the top with granulated sugar. Caramelise the sugar under a hot grill or with a blow torch if you have one
  • Butter a warm ramekin, make a caramel with 160g caster sugar and 6 tbsp. water, line the base of the ramekin with caramel and allow to cool. Fill the ramekins with custard and bake in a bain-marie (or a baking tray with water to the depth of half the ramekins) for 20 – 30 minutes until the custard is set. Invert onto a plate to serve.
Posted in Dessert, Vegetarian

Tempura prawns and vegetables

On our arrival in Palma de Mallorca almost the first thing we did was call in at one of our favourite restaurants, Caballito de Mar. The tempura batter needs to be very freshly made, it doesn’t need to rest and it doesnt keep at all well.  The key trick is to keep the oil hot so the batter creates a crust almost immediately stopping the batter becoming oily: the air in the batter will cause it to puff up and become crispy.

Ingredients

For the tempura batter

  • 85g plain flour sifted
  • 1 tbsp. cornflour
  • ½ tsp. fine sea salt
  • 200ml very cold sparkling mineral water
  • pinch of curry powder (optional)
  • ice cubes to keep it cold

For the vegetable roll

  • selection of firm vegetables cut into batons
  • 2 nori (seaweed) sheets

For the ginger dipping sauce (optional)

  • 3 tbsp. light soy sauce
  • 1 tbsp. rice wine vinegar
  • pickled sushi ginger chopped
  • pinch of sugar

Prawns

Oil for deep frying

Method

  1. Make the dipping sauce by whisking together the ingredients and stirring in the sugar
  2. Taste and adjust the sweetness
  3. Leave the dipping sauce for the flavours to integrate

Make the vegetable roll

  1. Lay a nori sheet on the worktop
  2. Align half the vegetable batons along one edge of the sheet
  3. Roll the sheet fairly tightly to give a thick cylinder about 4cm wide
  4. Make the batter by whisking all the batter ingredients together (the ice is purely to keep it cold) don’t over beat. It doesn’t matter about a few lumps.
  5. Heat the oil to 190C (a drop of batter will bubble up and brown almost immediately)
  6. Dip the vegetable roll into the batter
  7. Shake off the excess batter
  8. Fry immediately until the batter is crisp and golden brown (about 10 minutes)
  9. Repeat with the dipping and frying with the prawns
  10. The tempura can be kept warm in the oven at 150C (with the door slighly open so they don’t go soggy)
  11. To serve cut the ends of the nori roll square and then slice across the middle of the roll at an angle

Variants

  • Omit the nori roll – just dip the vegetables into the batter
  • Salmon or roast chicken leftovers work well inside the nori
  • Replaced the ginger in the dipping sauce with chilli or basil
Posted in Seafood, Spicy

Ratatouille with cheesy crust

I didn’t finish this post  before we went away for 4 days: but I am back now. I needed a take-away for students going back to Uni .

The french purists would probably not be best pleased if they saw what I do to the recipe I first learned as a teenager on exchange visit to France: Originally from Provence but it was just as nice served on our cycling trips through Brittany – out of a wide neck flask. I liked to dip French bread in it so you’ll see where that comes in. I am not a huge fan of courgettes (zucchini) normally so they need a bit of jujjing up first. I don’t use green peppers here as they go down to a sad grey mush.

Preparation time: 10 minutes plus 1 hour salting: Cooking time: about an hour

Ingredients

  • 2 aubergines
  • 2 large courgettes (or 4 small) – include a couple of yellow ones if you can find them
  • 2 tbsp. salt
  • 2 peppers
  • 2 medium onions
  • spray of olive oil
  • 500g tomatoes
  • 4 fat cloves of garlic
  • 1 chili (or more) cut into thin rings – optional
  • 4 slices of french bread cut on the diagonal – optional
  • soft cheese to your liking – optional

Method

  1. Slice the aubergines and courgettes thickly (about 2cm) – pat them dry and tip into a colander
  2. Sprinkle with sea salt and leave to drain for 1 hour. (This gets rid of much of the excess water)
  3. Brush the excess salt off the faces of the aubergines and courgettes
  4. To jujj up the courgettes and aubergines optional or go to step No.7
  5. Heat a griddle pan until hot
  6. Spray the faces of the aubergines and courgettes and lay onto the hot griddle to give a slighly charring then flip them over to repeat on the other side – you’ll need to do this in batches and let the pan get hot again between batches.
  7. Slice the tomatoes into thick slices – yes you could use tinned tomatoes – some people skin them first by splunging into boiling water for a minute & also take the seeds out but I can never be bothered
  8. Slice the onions into thinner slices
  9. Saute the onions and garlic until the onions are transparent
  10. Arrange the whole lot in an oven proof pan (I use the same sautepan)
  11. Sprinkle with the herbs
  12. Cover with a greaseproof sheet and the lid or tinfoil
  13. Bake at 190C for 45 minutes.
  14. Test the seasoning is to your liking
  15. Thickly spread the cheese on the bread and  grill until the cheese melts and browns.

Serve the ratatouille with a slice of cheesy toast on top.

Variants

  • Place the slices of cheesy bread on top of the ratatouille about 15 minutes through the baking
  • Omit the cheesy bread and simmer the ratatouille on the hob.
  • It is possible to do a very pretty arrangement of the vegetables for dinner party – to impress make 4 individual ratatouilles (see the film of the same name …..)
  • Make ratatouille ta-te-ta-tatin by laying a disk of flaky pastry over the vegetables and then turning out once cooked
  • I’ve had a version without onions but it wasn’t to my liking
Posted in Vegetarian

Chocolate chip cookies

The clocks went back last night to signal the end of Summer time but I was awake anyway. So I made these: the choice of chocolate is entirely up to you – the younger of the girls prefers milk chocolate but we didn’t any of that so I used what we did have: a small bar of very dark 70% cocoa and a small bar of white chocolate – which isn’t really chocolate.

Ingredients

  • 350g flour
  • 1 tsp. baking powder
  • pinch of salt
  • 225g unsalted butter
  • 350g golden caster sugar
  • 1 tsp. vanilla paste
  • 2 eggs
  • 300g chocolate cut into pieces

Method

  1. Preheat the oven to 190C
  2. Cream the butter, sugar, brown sugar and vanilla extract until creamy.
  3. Beat in the eggs.
  4. Gradually beat in the flour, baking powder and salt
  5. Stir in the chocolate pieces.
  6. Spoon walnut sized portions onto a greased baking sheet (makes about 15)
  7. The pre-prepared biscuit dough will keep in the fridge for several days
  8. Bake in batches for 9-11 minutes. until the edges are beginning to brown but still pale in the middle

Variants

  • Any chocolate at all (try toblerone! or one with the minty chips)
  • Replace 1 tbsp. of the flour with cocoa
  • Use jelly-tots or soft preserved fruit eg glace cherries instead of chocolate
  • Use the cookie dough in your non-churn ice cream I posted earlier
Posted in Baking, Biscuits

Chicken and tomatoes with Orzo

Hey, it’s Saturday morning and we are going away for a city-break on Monday: adults only. So, I have  to  use up anything in the fridge & freezer that won’t last until we get back next Friday. I like this dish as it more or less sorts itself out into temptingly moist chicken meat, a garlicky tomato sauce and crispy chicken skin if you like that sort of thing – which I do. Plus, it is incredibly lenient over cooking times. It seems at first glance to be quite a lot of garlic but as the cloves are thrown in whole it cooks down to a warm buttery note rather than the aggressive ponginess you’d get from minced garlic.

Preparation time: 10 minutes. Cooking time 2.5 hours (or longer)

Ingredients

  • 1.5 kg chicken thighs, legs and wings (skin on)
  • 1 bulb of garlic broken up into its cloves
  • 1kg tomatoes of various shapes, types and colours
  • 1 tbsp. fresh basil, including stems
  • 2 bay leaves
  • 1 tsp. dried chilli flakes or 1 fresh chilli chopped (optional)
  • 50g of orzo per person.

Method

  1. Preheat the oven to 160C
  2. Lay the thighs, legs and wings in a casserole with lid – it doesnt matter if they overlap slightly
  3. Throw the garlic cloves over the top of the chicken, push a few between the chicken pieces
  4. Add all the tomatoes to the casserole
  5. Add the basil
  6. Season with salt and pepper
  7. Cover with the lid (or tin-foil)
  8. Bake at 160C for 1 hour
  9. Check the liquid levels – the tomatoes will have started to burst and release juice
  10. Bake for another 1 hour – it wont come to any harm for 2 hours
  11. Thirty minutes before you want to eat – stir the orzo into the dish and put back into the oven for 20 minutes.
  12. The orzo will swell when it absorbs some of the juices and is cooked when a grain still has a little resistance. If you like your pasta softer (many modern Italians do) just leave for a further ten minutes.

Variants

  • You really only need the chicken and tomatoes.
  • Orzo is a pasta shaped like rice but you could use any small pasta – or maccheroni or paella rice.
  • Any other herbs works well; I like rosemary or sage
  • Slice a bell pepper or courgettes or leeks into the base of the casserole.
  • Add cooked sausage sliced into 2.5cm pieces and a tin of cannellini beans – (cassoulet like)
  • Use a few lamb chops which have been pan-fried in a little butter and olive oil first to render the fat from the chops – (kleftiko like)

Leftovers

  • The chicken meat pulled from the bones and slowly warmed in a frying pan with mayonnaise and a tbsp. of curry paste and served with a naan and/or rice and a splodge of chutney for a quick curry. Don’t cook it for too long as the chicken can seperate into thin strands and that is just ugly. Tastes okay though.
  • Fry a couple of rasher of bacon until crispy, warm the tender chicken meat in the bacon fat. Add the mixture to cooked spaghetti and stir in beaten eggs. (Carbonara style)
Posted in Chicken, Pasta, Slow, Supper

Fishcakes

When I was growing up a ‘fishcake’ was a peppery grey slab of fishy tasting paste covered in a vidid organge crust which was supposed to be breadcrumbs. I still loved them though. For the fish it is really up to you. Cod or haddock were the staples but just about any fish will do – or crab.

Serves 4: Preparation time 20 minutes. Plus chilling. Cooking time: 10 minutes

  • 450g skinned fish of your choice
  • 2 bay leaves
  • 2 black peppercorns whole
  • 150ml milk
  • 150ml water
  • 350g potatoes peeled and cut into even sized chunks
  • ½ tsp finely grated lemon zest
  • 1 tbsp. fresh parsley , chopped
  • 1 tbsp. snipped chives
  • 1 tbsp. mayonnaise
  • 1 egg beaten
  • 3 tbsp flour for dusting
  • 60g fresh white breadcrumbs
  • vegetable oil

Method

Poach the fish

  1. Lay the fish in one layer in a wide flat(tish) pan – eg a saute pan or frying pan with a lid
  2. Cover with the milk and water
  3. Add the bayleaf and peppercorns
  4. Cover  with a lid
  5. Bring to the boil on the hob and turn the heat to simmer for four minutes
  6. Leave the fish in the cooking liquid to continue cooking
  7. Boil the potatoes in salted water until tender
  8. Drain and mash the potatoes
  9. Add the mayonnaise, parsley,  lemon zest, chives
  10. Taste and adjust the seasoning with salt and pepper
  11. Lift the fish from it’s cooking liquor
  12. Flake the fish into the potato mixture trying to keep reasonable sized pieces of fish
  13. Divide the mixture into four equal portions
  14. Shape the mixture into circular cakes (they look better with vertical sides)
  15. If you have time chill the four patties in the fridge
  16. Put the flour onto a chopping board
  17. Put the beaten egg into a saucer
  18. Put the breadcrumbs into a further plate
  19. Dip each fishcake into the flour
  20. Then into the egg
  21. Then into the breadcrumbs so that they are evenly coated
  22. Chill them again (or keep covered in the fridge for up to a day) or you can freeze them for up to 2 months.
  23. To cook: add the vegetable oil to a frying pan and heat
  24. Shallow fry over a medium heat for about 5 minutes per side until the breadcrumbs are golden.

Serve with a segment of lemon and a watercress sauce, or parsley sauce.

Variants

  • Nearly all fish can be used – or the fishmonger may do a tray of mixed pieces for a fish pie
  • Change the herb mix for something different – or use a 2 tbsp. of thai curry paste
  • Add finely chopped leeks softened in a little oil
  • The breadcrumb coating could be omitted or replaced with fine oatmeal
  • Instead of shallow frying in vegetable oil use olive oil and a knob of butter
  • Instead of frying at all – brush with beaten egg and bake on baking parchment at 190C for about 35 minutes
Tagged with:
Posted in Fish, Prepare ahead, Seafood

Stuffed chicken breasts in Parma ham

As we had a busy day on Wednesday and ‘we’ are still on a high protein diet I needed to make something quick & high in protein and I had some pork and apricot sausage in the fridge. If the sausage isn’t quite to your liking you can always adjust the flavours in the sausagemeat. Parma ham gives a crisp,  slightly salty, finish.

I made three portions and the third one, cut into slices, made a very good lunch for her.

Ingredients (per portion)

  • 1 chicken breast fillet (skin off)
  • 1 of your favourite sauage (minimal rusk)
  • 2 slices of parma ham – you may need more if the breasts are big

Method

  1. Pre-heat the oven 220C
  2. Use a pair of scissors to cut the casing down the length of the sausage and put the filling on one side
  3. With a suitable implement bash the chicken breast out so it is about 1cm thick (meat hammer, rolling pin, ermmmm a pan?)
  4. Roll the flattened chicken breast around the nude sausage
  5. The chicken breast will roughly represent its original shape
  6. Lie the two slices of parma ham on the worktop so they slightly overlap
  7. Roll the stuffed chicken breast in the parma ham
  8. Put the breast on a baking sheet and turn the oven down to 190C
  9. Roast stuffed breasts for 20-25 minutes or until the juices are no longer pink ( internal temp is about 75C if you do it that way)
  10. Cover and leave to rest for 5 minutes.
  11. Serve with green salad and roasted cherry tomatoes or ……

Variants:

  • Any sausage of your choice – I have done it with blackpudding
  • Any thin ham to replace the Parma – or even streaky bacon
  • Stuffing can be anything you fancy – mozzarella ?
Posted in Chicken

Roast Chicken Fast or Slow

Recently I have become a huge fan of slow cooking at lower temperatures. I would use a ‘chicken brick’ if I had one but I have an oval enamelled casserole that does the job. My other option is to spatchcock the bird and roast it quickly. After a recommendation from Heston I have also begun to ‘brine’ my chickens overnight before I cook them.

Ingredients

To brine the chicken

  • 2kg roasting chicken
  • enough cold water to cover the chicken
  • 50g salt per litre of water

To cook the chicken

  • 1 container with lid large enough to hold the chicken
  • 1/2 a lemon
  • bouquet garni (bundle of mixed herbs tied) / tbsp. mixed herbs
  • 1/2 glass of white wine
  • splash of olive oil or 50g butter melted
  • several cloves of garlic
  • salt and pepper to season

 Method

Brine the chicken (optional – but worth it!)

  1. Put the chicken into a container just large enough to hold it
  2. Mix the salt with the water
  3. Cover the chicken with the salty water
  4. Cover the container with cling film
  5. Store in the fridge overnight.
  6. Dry thoroughly before cooking

To roast the chicken Method A

  1. Pre-heat the oven to 120C
  2. Smear the oil or butter over the skin of the chicken
  3. Place the lemon, garlic cloves and white wine inside the cavity of the chicken
  4. Place the bird inside the casserole/chicken brick
  5. Bake the casserole for 2 hours
  6. When the chicken is done the meat will be meltingly tender and the legs will begin to fall from the carcass, there will be no blood visible in the joint between leg and carcass
  7. Drain off the lemony chicken stock to use in your gravy/sauce
  8. Replace the lid on the chicken and let relax for 30 minutes
  9. Turn the oven up to 220C
  10. Remove the lid and roast the chicken for a further 15-20 minutes until the skin is crisp.

Roasting the chicken Method 2

  1. Pre-heat the oven to 220C
  2. Lie the chicken breast down, apply pressure to the back of the until you hear the breastbone crack
  3. Remove the wishbone
  4. Using kitchen scissors or a large knife carefully cut along both sides of the backbone and remove the backbone.
  5. If you like you could also remove the remainder of the ribcage at this point.
  6. Open the bird out and place what used to be inside the cavity down on on a baking tray
  7. Squeeze the lemon juice and oil or butter onto the skin of the chicken
  8. Season the skin with salt and pepper
  9. Roast the chicken  for 25 – 30 minutes until the juices run clear
  10. Collect the juices from the tray to make your gravy
  11. Divide the bird into four pieces
Posted in Chicken, Quick, Slow